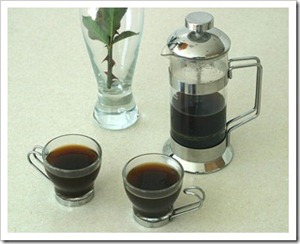
Brewing Methods: French Press Coffee Maker
 The first Coffee Press, which may have been made in France, was a metal or cheesecloth screen fitted to a rod that users would press into a pot of boiling water. The first patent for a Coffee Press was given to a Milanese designer Attilio Calimani in 1929. Faliero Bondanini made several design modifications, patented his own version in 1958 and began manufacturing it in a French clarinet factory called Martin S.A. This brewing method was further popularized across Europe by the name of and most notably, the Danish tableware and kitchenware company, Bodum.
The modern French Press is usually made of glass or clear plastic forming narrow cylindrical beaker, with a metal or plastic lid and plunger that fits tightly in the cylinder and has a fine metal-wire or nylon-mesh filter. The simplicity of the mechanism and its attractive presentation have led to a variety of aesthetic designs.
Now to the good stuff … how to use one!
Coffee-to-Water Ratio:
16:1 SCAA Standard = approximately 1oz (28g) coffee per 16oz (453g) water.
1.6 – 2.0 grams of coffee per fluid ounce of water; if you don’t have a scale, use 2 table spoons of coffee per 6 fluid ounces of water.
Directions for the French Press Coffee Maker:
- Start water boiling, then allow to cool during the next steps.
- Weigh proper coffee amount for size of finished cup.
- Pre-heat the press with some of your hot water, then dispose of the pre-heat water.
- Grind the pre-weighed coffee and add it to the press (a coarser grind than drip, but not as coarse as percolator is best).
- Pour the cooled water (optimal 200 degrees) in a circular motion to completely saturate the grounds, filling the press to about 1 inch from the top.
- Give the grounds a few good stirs and allow the coffee to bloom for about 30-40 seconds.
- Put the plunger on and press down until the grounds are fully submerged, but still at the top of the press.
- After the optimal steeping time is reached, then steadily and evenly plunge the grounds to the bottom of the press.
- Decant the coffee into your favorite mug or thermos (to keep it hot) and enjoy.
- Fully disassemble the plunger apparatus and thoroughly clean all parts and the press to eliminate rancid oils in your next brew.
For greater consistency, use a weight scale and stop pouring the water at the recommended weight for the size of your finished cup.
The whole brew time from bloom to finish should take approximately 3.5-4 minutes when done correctly.
Since there aren’t any paper filters to hold back the coffee oils, you get a stronger, richer, more full-bodied cup.
Here’s a great video of the “Reverse technique” used by coffee geek Christopher Hildebrand
Brewing Method Pros
- User temperature control
- No paper filters to buy, re-buy, or need to dispose
- User controlled brew time
- No build up of rancid coffee oils (when cleaned after each use)
- Eco-friendly, simple clean up
- Fuller flavor since all the coffee’s oils pass into the cup
Brewing Method Cons
- More coffee sediments get passed into your cup
- Glass vessel will lose heat quickly (within 10 minutes +/-)
- Even though the grounds are plunged, they will continue to extract in the vessel
- Clean up can get pretty messy
Brewing Method Suggested Coffees
- Brazil
- Mexico
- Sumatra