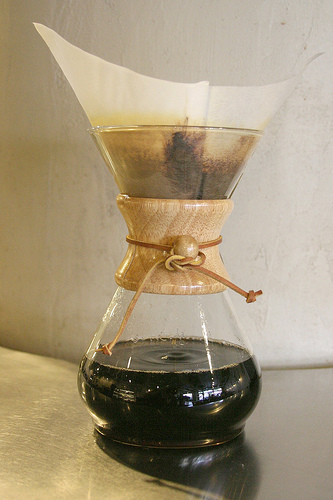
5 Reasons to brew Coffee in a Chemex

The Chemex coffee-making system was developed by a chemist, Peter Schlumbohm in the early 1940′s. Using his authority in science as a sales tool, he described the product as "The Chemist’s way of making coffee … the funnel of the Chemex creates ideal hydrostatic conditions for the unique Chemex extraction."
- Temperature: By using the special Chemex-bonded paper filters and water at 190-200 degrees Fahrenheit, leaves the coffee fats and bitters behind in the coffee grounds and not in your cup. Automatic drip brewing with a home coffee machine usually can’t reach this high of a temperature.
- Time: You can control the extraction time of the Chemex by varying the fineness of your coffee grounds and by altering your pouring technique. The thickness of the filters mentioned above, help to give your coffee the proper extraction time for pulling the most flavor from the bean into your cup.
- Simplicity: The Chemex is a more simple and much cleaner method of brewing coffee. You avoid the build up of rancid coffee oils that a home coffee machine invariably deposits … not to mention the unseen calcium build up within the innards of the automatic coffee machine.
- Taste: Since the Chemex isn’t sitting on a burner to stay warm, you don’t have to worry about running into that "burnt" flavor that automatic machines eventually leave behind.
- Consistency: Getting a consistently good brew out of a Chemex is less dependent on the skills of the barista and more dependent on using the correct brewing & pouring techniques.
Now to the good stuff … how to use one!
Coffee-to-Water Ratio:
Directions for a Chemex Coffee Maker:
- Start water boiling, then allow to cool during the next steps.
- Weigh proper coffee amount for size of Chemex.
- Place Chemex paper filter into the top of the Chemex making sure the 3-layered side is facing the spout, allowing air to escape during the brewing process.
- Pre-soak the paper filter to avoid a papery taste in the final coffee brew and pre-heat the glass vessel.
- Without removing the filter (to maintain suction integrity), tip the Chemex over a sink to dispose of pre-soak water.
- Grind the pre-weighed coffee and add it to the filter.
- Use the cooled water (optimal 200 degrees) to completely saturate the grounds and allow the coffee to bloom for about 45 seconds.
- Using a continuous circular motion, slowly pour water over the grounds, avoiding the sides of the Chemex and pouring into the middle.
- Stop pouring the water when you’ve reached about 1 inch below the wood collar and allow to continue dripping.
- Discard the filter/grounds and enjoy your Chemex coffee.
For greater consistency, use a weight scale and stop pouring the water at the recommended weight for the size Chemex you’re using.
The whole brew time from bloom to finish should take approximately 4 minutes when done correctly.
You can substitute a metal cone filter for the paper filters, but still pre-heat the filter and glass.
Brewing Method Pros
- User temperature control
- Paper filters block fats and bitters of grounds (pro & con)
- User controlled brew time
- No build up of rancid coffee oils
- Consistent taste via grinding, brewing and pouring techniques
Brewing Method Cons
- Periodically replenish paper filter supply (unless using a metal cone)
- Paper filters block fats and bitters of grounds that some people prefer
- Glass decanter allows brew to cool quickly
Brewing Method Suggested Coffees
- Brazil
- Ethiopia
- Guatemala
- Kenya
- Peru